Installing Python through Anaconda
Python is a popular language for scientific computing, and great for general-purpose programming as well. Installing all of its scientific packages individually can be a bit difficult, however, so we recommend the all-in-one installer Anaconda.
- Navigate to the download page for Anaconda.
- Download the appropriate installer for your operating system. Make sure you get the installer listed under Python 3 (not 2.7).
- Double click the installer icon and follow the set-up instructions, keeping most of the default options. If you are Windows, make sure to choose to choose the option Make Anaconda the default Python during installation.
Installing a Text Editor
You will need a text editor for this workshop. If you do not have a preferred text editor for writing code, we recommend Visual Studio Code. Download Atom at the link and install on your computer.
Obtain lesson materials
- Download the files needed for these lessons here
- Create a folder called
cms-workshopon your Desktop. - Move the downloaded materials to the new folder.
- Unzip the file.
Start a Jupyter notebook
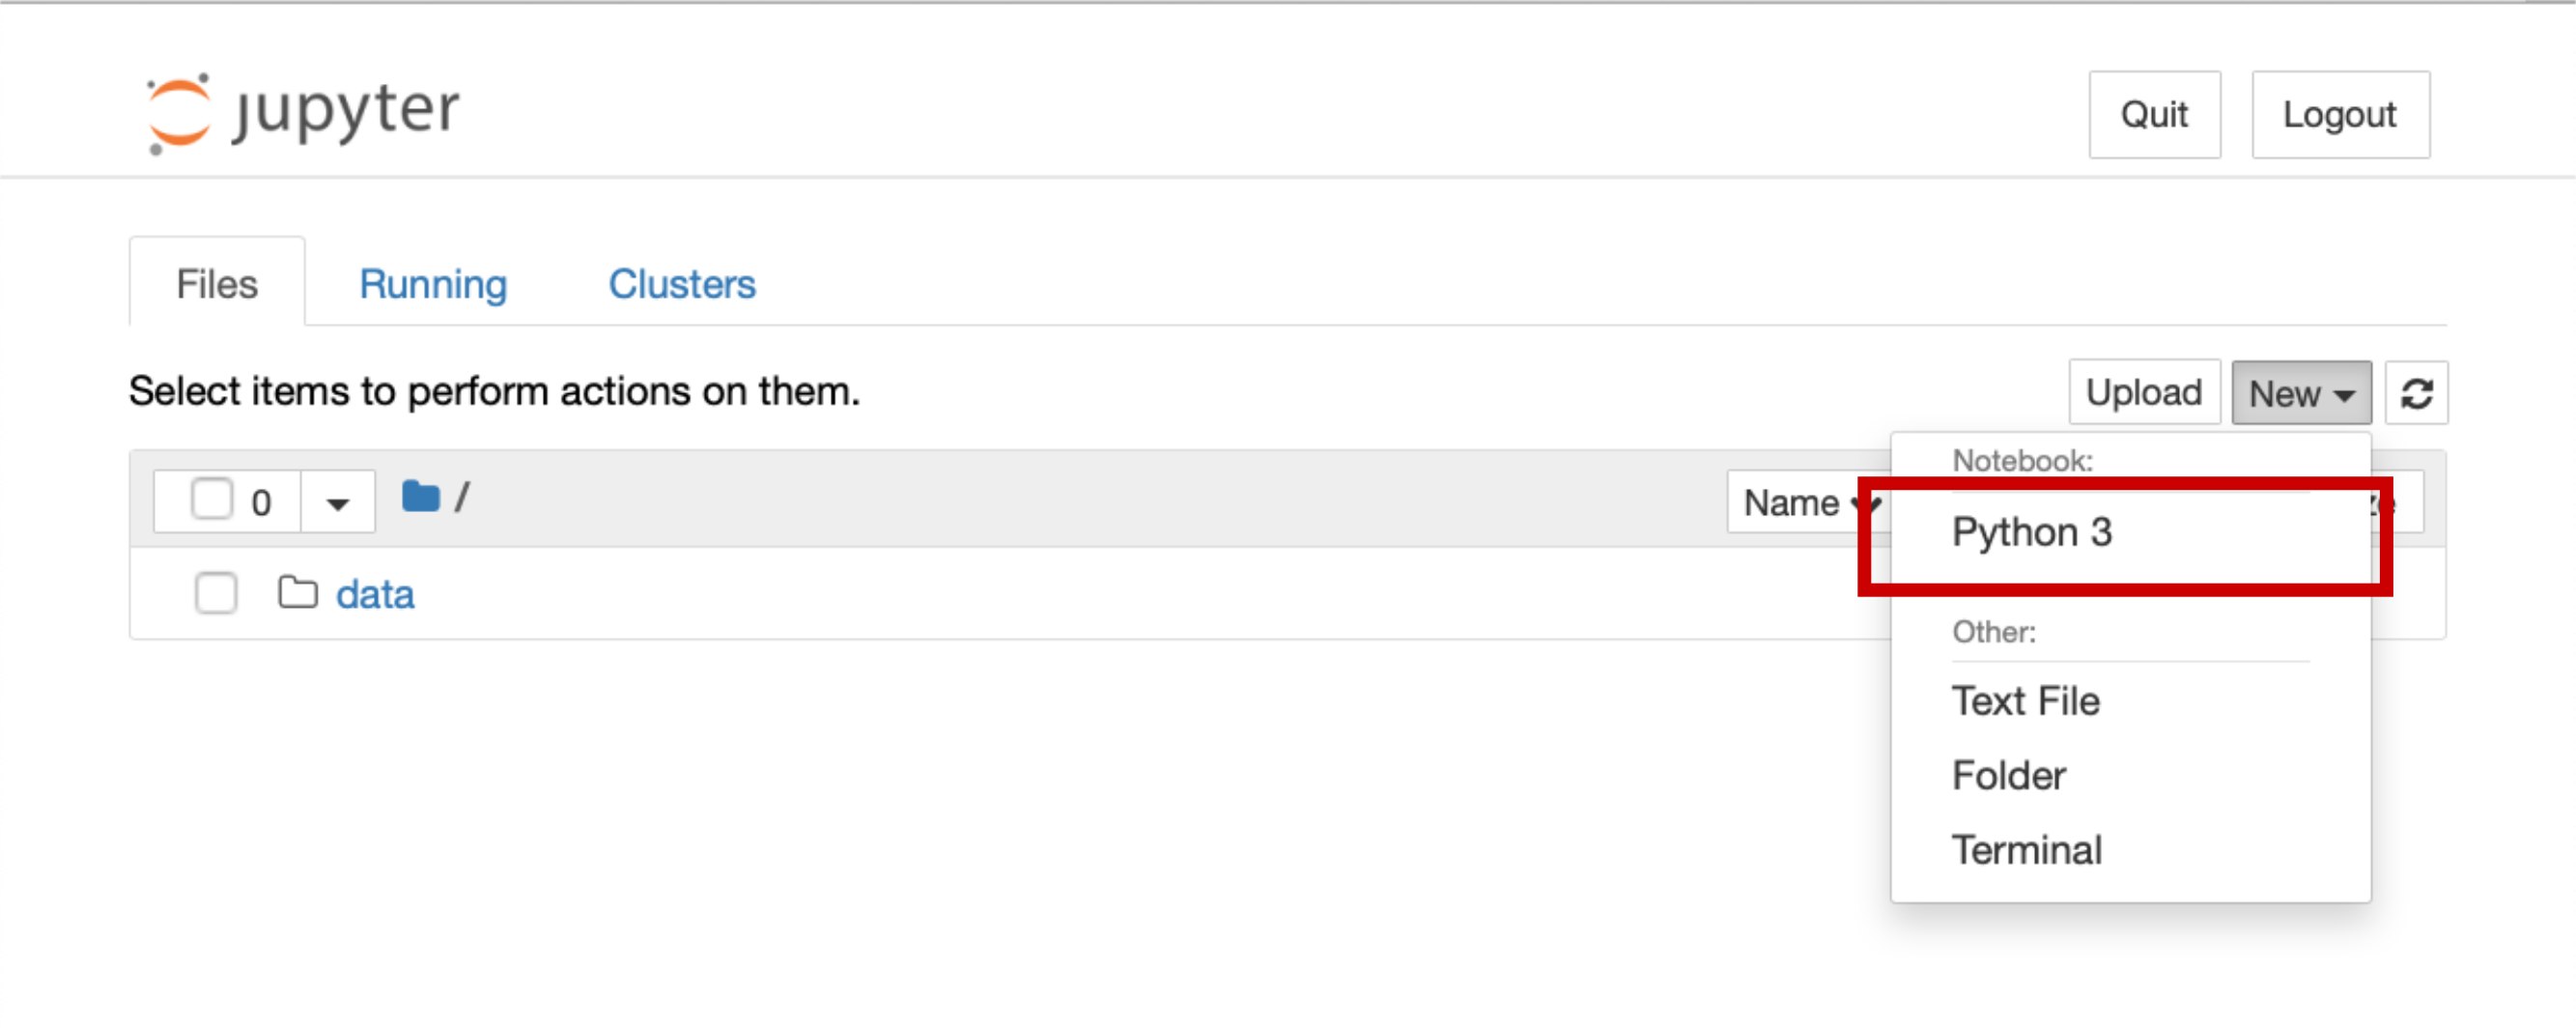
From Finder or Spotlight (Mac OS) or the Start Menu (Windows) find the Anaconda Navigator. The icon looks like a green circle. Click Launch under Jupyter Notebook. It may take a few seconds to load the page, especially if it is the first time you have ever used the jupyter notebook, so don’t panic if nothing loads for a few seconds. Then a new window should open in your default internet browser. Use the file navigation window to navigate to Desktop and then to the cms-workshop folder. In the upper right hand corner, click New, then choose Python 3 from the dropdown list (shown below)

This will start a new Jupyter notebook using Python 3. You’re ready to go!