Setup
Participation in the MolSSI Software Summer School will require use of your own personal laptop and installation of some software.
Please follow the instructions given here to make sure you have the necessary software installed. We will be using Python and the conda package manager from Anaconda.
Again, please read this page in its entirety. After you have installed Anaconda, there are instructions for creating an environment using conda.
Installation varies by operating system (OS).
Anaconda Installation
Windows
If your computer uses the Windows operating system, we strongly recommend installing Windows Subsystem for Linux (WSL). Follow the installation instructions at this link. If you don’t have a preference on Linux distribution, we recommend installing Ubuntu 18.04.
Once WSL is installed, open your ‘Start’ menu and choose ‘Ubuntu’. This should open a terminal window. The first time you have opened Ubuntu, you will see a message which says “Installing, this may take a few minutes…”. After the installation is done, you will have to create a username and password. After these are created, you should be able to use the terminal.
For the WSL, you have to install Anaconda from the command line. Open a terminal, then follow the installation instructions given here. Specifically, the commands you will need are
wget https://repo.anaconda.com/archive/Anaconda3-2019.03-Linux-x86_64.sh
bash Anaconda3-2019.03-Linux-x86_64.sh
After installation, close and reopen your terminal window. If you do not see (base) before your username on the command line, type
conda init
then close and reopen your terminal window.
Next, check if ‘anaconda3’ is in the path that prints when you type ‘which python’. If not, type the following command into the terminal (change to have your username)
echo ‘export PATH=/home/YOUR_USERNAME/anaconda3/bin:$PATH’ >> ~/.bashrc
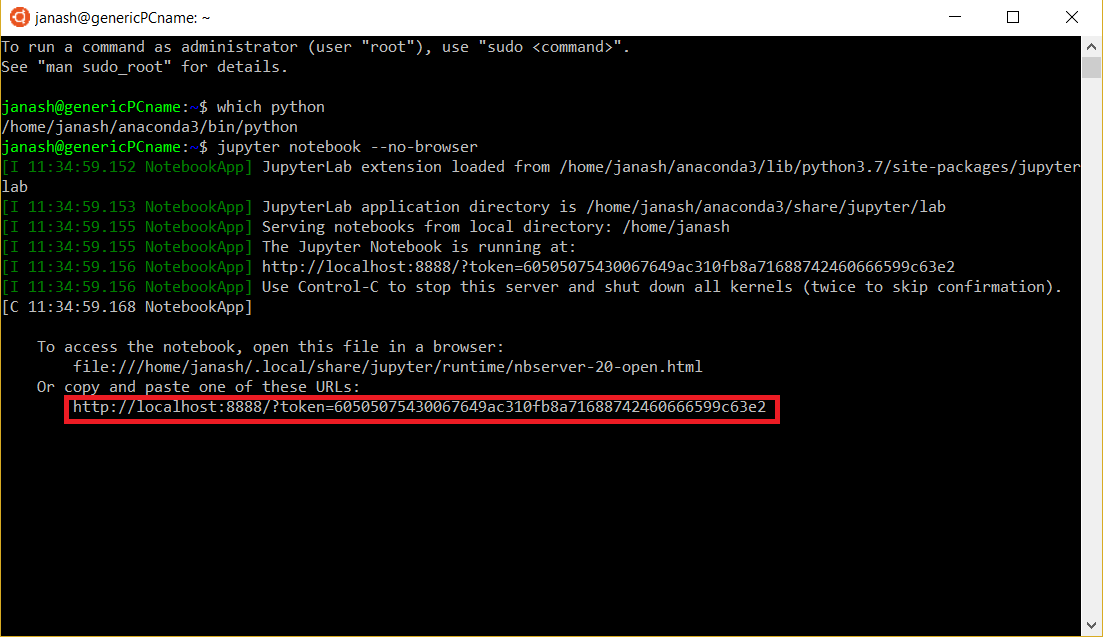
Verify that you have Anaconda installed by opening a Jupyter notebook.
jupyter notebook --no-browser
Your window should look similar to this after the command. Copy the URL outlined in red, and paste it into a browser.
After verifying your Jupyter notebook works, you will also need to install a compiler. Use this command
sudo apt install build-essential
The next section tells you how to create a symlink so that you can access your Windows files easily from the WSL.
Make a directory called windows
mkdir windows
Create a symlink to your Windows files
ln -s /mnt/c/Users/YOUR_WINDOWS_USERNAME windows
Be careful when working in the WSL, and with your symlink. Do not edit any Windows system files. Any files you delete in the windows folder from the WSL will be deleted on your computer.
If you are not able to install the WSL, please make sure that you at least have the Python 3.7 version of Anaconda for Windows installed.
Mac OS and Linux
You can download Anaconda and install using this link. Make sure to download the correct distribution for your OS and choose the Python 3.7 version. Install the software as you would install any software you downloaded.
Linux users can also install Anaconda using the command line instructions given in the Windows section.
MacOS users should also install XCode.
Linux users should install compilers using this command
sudo apt install build-essential
Creating a Software Summer School conda environment
Everyone should complete and read this section after installing Anaconda.
To make a great deal of compilation and installation simpler we will create a conda environment. This environment isolates the software summer school stack from the rest of the dependencies on your laptop.
After installing Anaconda, type the following command into your terminal. This creates an environment called “sss_2019” which runs Python 3.7.
conda create -n sss_2019 python=3.7
After creating the environment, activate it using the command
conda activate sss_2019
Next, install the Python libraries numpy and matplotlib
conda install numpy
conda install matplotlib
conda install jupyter
conda install qcportal -c conda-forge
Throughout the week, we will ask you to install different packages into this environment.
Installing and configuring git
Installation
Install git in your sss_2019 environment using this command.
conda activate sss_2019
conda install git
Configuring Git
The first time you use Git on a particular computer, you need to configure some things.
First, you should set your identity. One of the most important things that version control like Git does is to keep track of who changes what. This helps repository maintainers coordinate the efforts of all the people who contribute to the project. Most importantly, it makes it easier to figure out who to blame when something goes wrong. You can provide git your name and contact information with the following commands:
git config --global user.name "<Firstname> <Lastname>"
git config --global user.email "<email address>"
Next, you might want to change the Git text editor. As we will see later, certain Git commands will open text files. When this happens, Git will use your environment’s default text editor, which might not be the editor you are most comfortable using. Using configuration commands, you can tell Git to use your favorite editor.
Everyone can use Vim as a text editor, but you can set it to your preference. If you are using the WSL, use Vim as your text editor:
$ git config --global core.editor "vim"
A more complete list of possible editors is available here.
You can check the configuration commands that you have set using:
git config --list
Text Editor/IDE
Everyone should have a text editor they can use to edit Python. If you do not have a preference for text editors, we recommend Atom if you would like something basic, or Visual Studio Code if you would like a more advanced editor.
Computer Help
Please attempt the above installation before arriving. If you have trouble with installation, computer help will be available at your dorm on July 21, 2019 (the Sunday you arrive) from 6:00 PM - 7:30 PM. We will be near the check-in desk. If you are not able to install the software, and are also not able to come for help, please send an email so we can help you!
Communication
You should have all received an invite the MolSSI Education Slack. Throughout the summer school, we will be sharing important information through slack. This is a Slack space that has former summer school participants as well as all MolSSI Software Fellows. We will have a private channel for the 2019 Summer School, and you can also use Slack to communicate with others at the 2019 Summer School.